To start creating your Campaign, you should have made the following settings:
- Create a contact segment or form to initialize your Campaign. If you are already using an existing segment or form, make sure they are up to date.
- Create all the custom fields you need for your contact profile.
- Set up appropriate channels such as text messages, emails, and focus items to communicate with your contacts.
- Create assets, landing pages or other components that you want to use for your Campaign. If you are using assets, make sure you have uploaded them before you start the Campaign.
- Although you can set up channels and create components while creating the Campaign, it’s ideal if you prepare them as this will make the Campaignprocess faster and more efficient for you.
Then it’s on to creating your first Campaign:
To start creating Campaign, perform the following steps:
- Click Campaignin the left navigation menu.
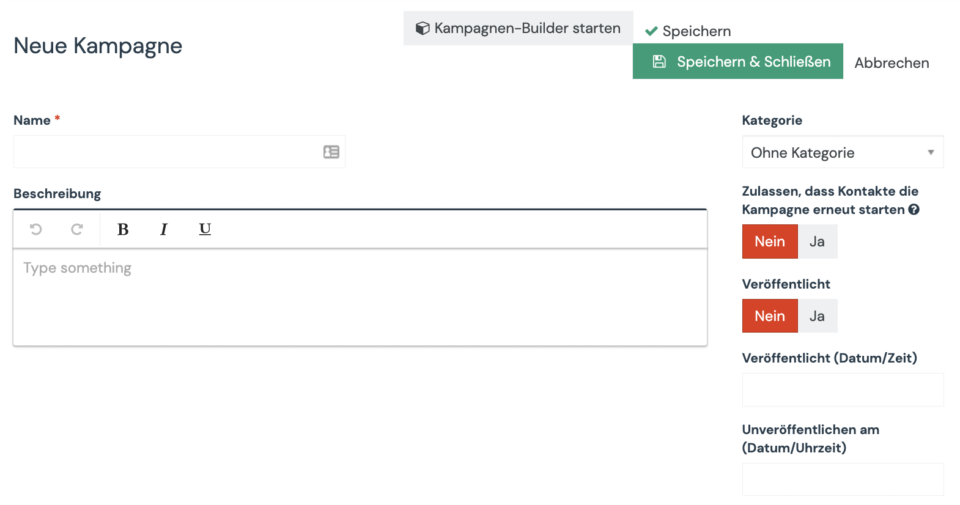
- Click on “+ New” in the upper right corner. The New CampaignWizard is displayed, as shown in the figure below.

- Enter a name and a short description for your Campaign. Optionally, you can specify the following settings:
- Category. Categories help you organize your Campaign.
- Allow contacts to restart the Campaign. Click the toggle switch to allow contacts to restart the Campaign when they create a Campaign for a recurring message (e.g., birthdays, subscriptions) or transactional activity (e.g., activity notifications, data refresh). Enabling this option allows contacts to run the same Campaign several times.
- Published. Click the toggle to publish or not publish the Campaign. Make sure you don’t publish a Campaign until it’s actually ready and tested. You can publish a Campaign at a later time or unpublish it by setting a time and date.
- Click “StartCampaign” to start creating the Campaign and add at least one event to save it.
- After adding events to your Campaign, close the Campaignand click Save & Close to save your changes.

